
How to Assign a Static IP Address to an Epson Printer Using EpsonNet Config
By default, Epson network printers use DHCP (Dynamic Host Configuration Protocol) to request an IP address from your home or office router. While convenient during initial unboxing, dynamic IPs frequently change after router reboots or power outages, resulting in frustrating "Printer Offline" errors across all workstations.
Assigning a permanent, static IP address ensures that Windows Print Spooler and macOS CUPS daemons can always communicate with the printer hardware. Follow this complete guide to reserve and transmit a fixed IP configuration.
Step 1: Check Your Router's DHCP Pool
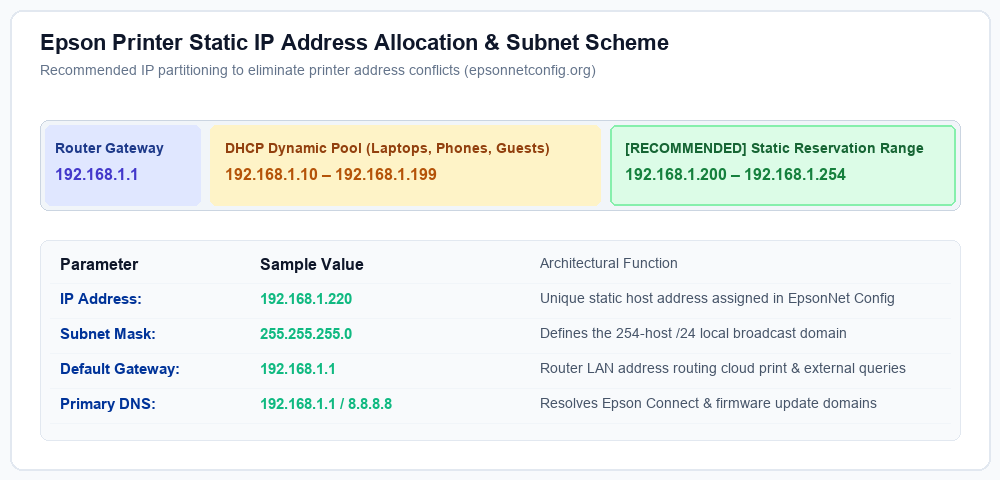
To avoid assigning an IP address that another phone, laptop, or smart TV might inadvertently claim, inspect your router's DHCP reservation pool:
- Router Gateway:
192.168.1.1 - DHCP Dynamic Pool:
192.168.1.10to192.168.1.199 - Recommended Static Reservation:
192.168.1.200to192.168.1.254
Step 2: Enter Static Values in EpsonNet Config
- Launch EpsonNet Config on your computer.
- Wait 5 to 10 seconds for the discovery sweep to complete.
- Select your target printer model and click Configuration in the toolbar.
- In the left navigation sidebar, expand Network > TCP/IP > IPv4.
- Switch the IP Address Assignment mode from "Auto" to "Manual".
- Input your static parameters:
- IP Address:
192.168.1.220 - Subnet Mask:
255.255.255.0 - Default Gateway:
192.168.1.1 - DNS Server (Primary):
192.168.1.1or8.8.8.8
- IP Address:
- Click Transmit at the bottom right.
Step 3: Verification & Print Queue Update
Once transmitted, the printer network card restarts in roughly 15 seconds. Open Command Prompt or Terminal and ping the newly allocated address:
ping 192.168.1.220
If you receive continuous replies with zero packet loss, update your Windows Standard TCP/IP Port in printer properties to point directly to 192.168.1.220.
Need EpsonNet Config Software?
Download the authenticated v4.9.5 for Windows and v4.9.8 for macOS directly from our official download table with complete checksum hashes.
Go to Official Downloads →